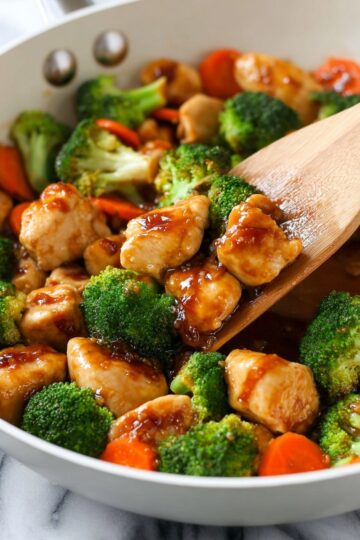
With its perfect balance of tender chicken, silky eggs, and savory sauce, this Crispy Chicken and Egg Rice Bowl Recipe is a comforting dish that feels like a warm hug in a bowl. Whether you're new to Japanese cooking or just want an easy weeknight winner, I'm excited to share how you can make it effortlessly at home.

Jump to:
Why You'll Love This Recipe
I've made this recipe countless times, and it never fails to bring smiles. The Crispy Chicken and Egg Rice Bowl Recipe combines simple ingredients into something truly special — quick to prep, easy to dress up, and absolutely satisfying every single time.
- Effortless yet impressive: You’ll spend less than 30 minutes from prep to table, but it tastes like you’ve been simmering it all day.
- Perfect texture combo: Tender, juicy chicken contrasts beautifully with softly cooked eggs draped over warm rice.
- Flexible ingredients: Easily swap chicken for plant-based alternatives or tweak seasoning amounts to suit your taste.
- One-bowl wonder: Comfort food that cleans up quickly because everything cooks in a single pan and lands on the rice perfectly.
Ingredients & Why They Work
This Crispy Chicken and Egg Rice Bowl Recipe shines because each ingredient plays a specific role—from the umami-packed dashi broth to the sweet hint from mirin—blending into that unforgettable taste. Picking quality chicken and fresh eggs is key for the best flavor.

- Boneless, skinless chicken thighs: Perfectly juicy and tender, thighs give more flavor and stay moist better than breasts.
- Onion: Adds sweetness and soft texture as it simmers in the sauce.
- Dashi (Japanese soup stock): The flavor backbone – brings subtle umami without overpowering the dish.
- Soy sauce: Provides salty, savory depth and rich color.
- Mirin: A sweet rice wine that balances the soy and adds a gentle sweetness.
- Sake: Helps tenderize chicken and adds complexity; you can substitute dry sherry or omit if you prefer.
- Sugar: Just enough to mellow the sauce and brighten flavors.
- Eggs: The star of the show—adding silkiness and richness when gently cooked over the chicken.
- Mitsuba (Japanese parsley) or scallions: Fresh herbal notes for a lively garnish.
- Japanese short-grain rice: Sticky and tender rice holds everything together perfectly.
Make It Your Way
I usually keep things classic, but I love adding a personal twist depending on the season or mood. This Crispy Chicken and Egg Rice Bowl Recipe is endlessly adaptable—feel free to experiment!
- Variation: For a vegetarian-friendly bowl, I swap chicken for plant-based meat substitutes and JUST Egg for traditional eggs—it still tastes wonderful. The dashi becomes vegan with kombu mushroom stock.
- Spice it up: I often sprinkle shichimi togarashi on top to add a spicy kick, which awakens the flavors without overwhelming the dish.
- Extra veggies: Adding sliced mushrooms or snap peas on the onions before simmering adds a fresh crunch and makes the bowl more colorful.
Step-by-Step: How I Make Crispy Chicken and Egg Rice Bowl Recipe

Step 1: Prep the Ingredients with Care
Start by slicing half an onion thinly along the length—it softens beautifully while simmering. Chop fresh mitsuba or scallions into bite-sized bits for garnish. Trim any excess fat from your chicken thighs, then cut them into bite-sized pieces using the sogigiri method (cut diagonally against the grain). This trick creates more surface area so your chicken absorbs loads of flavor and cooks quickly. Don’t forget to marinate the chicken briefly with sake to tenderize it.
Step 2: Mix the Seasoning Sauce
Whisk together dashi, soy sauce, mirin, and sugar until the sugar dissolves. This delicate balance creates the umami-rich sauce that gently cooks and flavors the onions and chicken. Keep this handy—you’ll need it soon.
Step 3: Simmer the Onions and Chicken
Place the onions flat in a medium frying pan with the seasoning sauce. Heat on medium until the mixture just starts to simmer. Add the chicken evenly over the onions, then reduce to medium-low heat. Cook uncovered for about 5 minutes, flipping the chicken halfway through. The aroma starts filling your kitchen here—trust me, patience pays off!
Step 4: Add the Eggs Like a Pro
This is my favorite step because it’s all about technique. Crack your eggs into a bowl but use chopsticks to gently “cut” the whites into smaller chunks rather than whipping them, so you get that beautiful marbled effect once cooked. Pour two-thirds of the egg in a circular pattern over the simmering chicken and onions—avoid the edges to keep the eggs tender. Cover the pan if needed until the eggs are almost set but still glossy with a touch of runniness.
Then drizzle the remaining third of the eggs, scatter the mitsuba over top, and cook on medium-low until you reach your ideal egg doneness. This two-stage egg cooking method keeps the eggs silky and vibrant—definitely a trick I learned after some early kitchen trials.
Step 5: Assemble Your Crispy Chicken and Egg Rice Bowl
Ladle steaming hot Japanese short-grain rice into bowls. Gently slide or scoop the chicken and egg mixture on top, letting the sauce drizzle over the rice. If you like, finish with a sprinkle of shichimi togarashi or sansho pepper for that peppery zing. Serve immediately and watch how everyone digs in eagerly — it just feels like a celebration in every bite.
Top Tip
I’ve found that small details make a huge difference with this Crispy Chicken and Egg Rice Bowl Recipe. Here are a few nuggets from my kitchen you don’t want to miss:
- Keep eggs at room temperature: This helps them cook evenly without shocking the proteins into tough rubberiness.
- Don’t overwhisk your eggs: Gently cutting whites instead of beating keeps that lovely marbled look and silky texture on top.
- Use the right pan size: A medium frying pan or oyakodon pan ensures the broth just covers the onions, letting flavors infuse perfectly.
- Simmer gently: High heat toughens the chicken and dries out the eggs, so aim for a gentle simmer and adjust as needed.
How to Serve Crispy Chicken and Egg Rice Bowl Recipe

Garnishes
I always reach for fresh mitsuba when I have it because it delivers a subtle herbal brightness that cuts through the richness perfectly. If you don’t have mitsuba on hand, thinly sliced green onions work wonderfully too. For an extra layer of flavor and a hint of spice, I recommend sprinkling shichimi togarashi right before serving — it adds just the right warming punch to the dish.
Side Dishes
This rice bowl satisfies on its own, but I love pairing it with a simple cucumber sunomono salad or a bowl of miso soup to round out the meal. Pickled vegetables add a nice tang that contrasts nicely with the savory chicken and eggs.
Creative Ways to Present
Want to impress someone special? Try serving the bowl in pretty donburi dishes or wooden bowls for an authentic Japanese vibe. A side drizzle of yuzu kosho paste or a small dish of spicy kimchi can turn this humble bowl into a luxe dinner party feature.
Make Ahead and Storage
Storing Leftovers
If you have leftovers, store the chicken and egg mixture separately from the rice in an airtight container. I usually keep them refrigerated for up to 2–3 days—the sauce tastes even better the next day after all those flavors meld together.
Freezing
You can freeze the chicken and onion mixture without the rice for up to one month. Thaw overnight in the fridge and gently reheat on the stove with a splash of dashi or water to refresh the sauce. Avoid freezing the eggs as the texture changes when thawed.
Reheating
To warm leftovers, gently reheat the chicken and egg mix over low heat, adding a tablespoon of water or dashi to keep it saucy. Microwave steamed rice covered with a damp paper towel to keep it moist. Then reassemble just before eating for the best texture.
Frequently Asked Questions:
You can substitute chicken breasts, but thighs tend to stay juicier and more flavorful when simmered. If using breasts, watch cooking time closely to avoid drying out the meat.
In Japan, raw and lightly cooked eggs are standard and safe due to strict food safety standards. If you're concerned, cook eggs through fully to your liking or use pasteurized eggs.
You can use a dashi packet, powdered dashi, or a vegan dashi made from kombu seaweed and dried shiitake mushrooms. Chicken broth is a reasonable substitute if you don't have Japanese ingredients on hand.
Absolutely! Using a smaller frying pan or an oyakodon pan, you can cook a single serving easily by halving the ingredients. It’s a perfect solo comfort meal.
Final Thoughts
This Crispy Chicken and Egg Rice Bowl Recipe holds a special place in my home kitchen. It’s straightforward enough for a busy night yet comforting enough to feel like a treat. I hope you find, as I did, that the magic lies in the simple details and fresh ingredients. Try it soon—it’s like bringing a little piece of Japan into your very own weekend dinner rotation.
Print
Delicious Recipe
- Prep Time: 15 minutes
- Cook Time: 10 minutes
- Total Time: 25 minutes
- Yield: 2 servings 1x
- Category: Main Course
- Method: Frying
- Cuisine: Japanese
- Diet: Low Lactose
Description
Oyakodon is a classic Japanese comfort food featuring tender chicken and soft, lightly cooked eggs simmered in a flavorful dashi-based sauce, served over steaming bowls of Japanese short-grain rice. This recipe offers two cooking methods to prepare this delicious and satisfying chicken and egg rice bowl, perfect for a quick yet hearty meal.
Ingredients
Main Ingredients
- ½ onion (4 oz, 113 g; peeled)
- 10 oz boneless, skinless chicken thighs
- 1 Tbsp sake
- 3-4 large eggs (50 g each w/o shell)
Seasonings
- ½ cup dashi (Japanese soup stock)
- 2 Tbsp soy sauce
- 2 Tbsp mirin
- 2 tsp sugar
For Serving
- 2 servings cooked Japanese short-grain rice (about 3⅓ cups, 500 g cooked)
- 4 sprigs mitsuba (Japanese parsley) or green onion/scallion
- Shichimi togarashi (Japanese seven spice) – optional
- Japanese sansho pepper – optional
Instructions
- Prepare the seasonings: Combine ½ cup dashi, 2 tablespoon soy sauce, 2 tablespoon mirin, and 2 teaspoon sugar in a bowl or liquid measuring cup, stirring until the sugar dissolves.
- Prepare ingredients: Slice ½ onion lengthwise into ¼ inch strips. Chop 4 sprigs mitsuba into ½ inch pieces. Trim fat and connective tissue from chicken thighs and cut into roughly ¾–1 inch square pieces using the sogigiri technique. Sprinkle chicken with 1 tablespoon sake and set aside for 5 minutes. Crack eggs into a bowl and gently cut the whites 5–6 times with chopsticks to create clumps, keeping yolks mostly intact for a marbled look.
- Cook onions and chicken: In a medium frying pan off the heat, arrange sliced onions in a single layer and pour the seasoning mixture over to just cover them. Heat on medium until simmering, then add the chicken evenly on top of the onions. Once simmering again, reduce heat to medium low and cook uncovered for 5 minutes, flipping chicken halfway until no longer pink and onions are tender.
- Add eggs in two stages: Increase heat to medium. Drizzle two-thirds of the eggs in a circular pattern over chicken and onions, avoiding edges. Cook gently, adjusting heat as needed. Once eggs are just set but still runny, add the remaining one-third of eggs around the pan and add mitsuba on top. Cook on medium low until eggs reach desired doneness, usually almost set but still soft.
- Serve: Portion cooked rice into bowls. Slide the cooked chicken and egg mixture over the rice. Drizzle pan sauce over the top. Add optional shichimi togarashi or sansho pepper for extra flavor if desired.
- Alternate cooking method (oyakodon pan): Divide ingredients in half and cook in two batches using a small oyakodon pan or small frying pan. Follow the same steps but reduce simmer time to 4 minutes and serve each portion individually onto rice bowls.
Notes
- Use plant-based chicken substitute and vegan egg alternatives for a vegan version.
- If sake is unavailable, substitute with Chinese rice wine or dry sherry, or omit.
- Oyakodon pans ease sliding cooked ingredients onto rice; otherwise, use a medium or small non-stick pan.
- For soft, runny eggs, avoid whisking eggs fully and add eggs in two stages as described.
- Raw eggs are safe to consume in Japan; ensure freshness and source quality eggs if following this method.
- Leftovers can be refrigerated in an airtight container for up to 2–3 days.
- Adjust seasoning quantities if using a larger frying pan to ensure onions are adequately covered.
Nutrition
- Serving Size: 1 serving
- Calories: 537 kcal
- Sugar: 11 g
- Sodium: 1197 mg
- Fat: 13 g
- Saturated Fat: 4 g
- Unsaturated Fat: 8 g
- Trans Fat: 0.1 g
- Carbohydrates: 50 g
- Fiber: 1 g
- Protein: 42 g
- Cholesterol: 414 mg


Leave a Reply